
Schedule WhatsApp messages for later in our app
Step 1: Create your account
You need to Sign Up using either Google Sign In or an Email to be able to schedule WhatsApp messages from our website.
Step 2: Go through the onboarding
Once you log in and set up your account with your Phone number, and after you have linked your WhatsApp account, you can start scheduling WhatsApp messages.
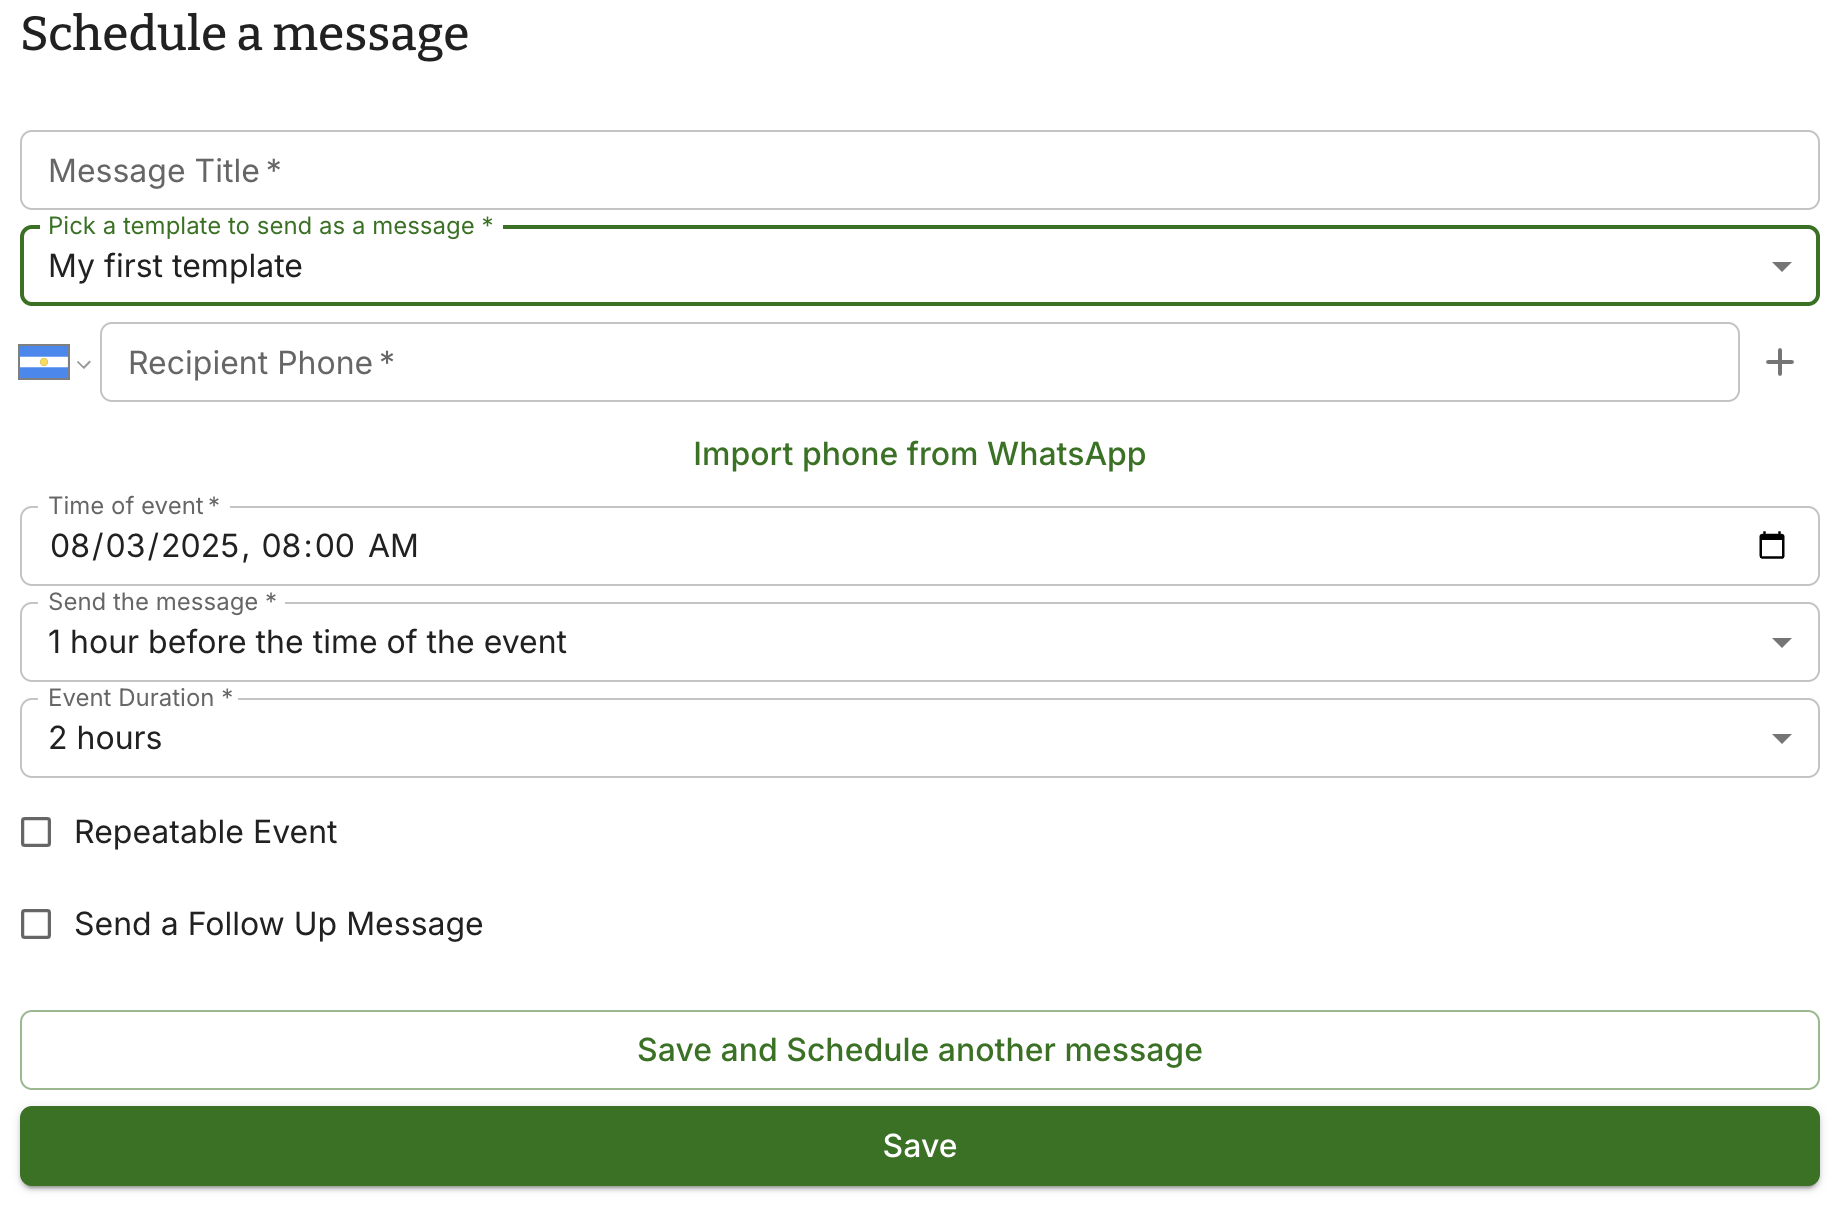
Step 3: Schedule a message
To schedule a message, you need to go to the Schedule Message page.
You will need to:
- Fill in the title of the message
- Pick a template for the message or Write a Custom Message
- Now you can either Import a Phone number from a WhatsApp contact or manually write the phone number you want to send the message to
- Pick the time for the event
- Pick a time offset if you want the message to be sent before the event happens
- Optionally you can make the event recurring or repeatable, so the message will be sent multiple times
- Click 'Save' to schedule the message
Step 4: Use variables for your message
You can use variables for your templates or messages. For example, you can use the variable {{HH}} to insert the time of the event. You can learn more about variables here.
Step 5: We are all set!
Now if you go to the Dashboard you will see the message scheduled in the list of scheduled messages. Remember to pick the correct date to filter and see the message you just scheduled.